





How to Perform an Ampoule Break Force Test According to ISO 9187-1
Can your glass ampoules withstand handling yet open reliably when needed? An ampoule break force test measures opening resistance under defined loading conditions.
For quality control and safety teams, reliable results depend on correct specimen selection, fixture geometry, opening-point orientation, controlled loading, and documented acceptance criteria.
This guide explains the practical workflow and common sources of error. Use it alongside the applicable edition of ISO 9187-1 and your approved procedure.
Drawing on Paratronix Instruments’ pharmaceutical packaging testing focus, it also explains how to assess equipment suitability and produce results that support informed quality decisions.
What Does ISO 9187-1 Require You to Establish First?
ISO 9187-1 addresses glass ampoules for injectable preparations. Before testing, confirm the applicable edition, ampoule designation, and requirements referenced in your purchasing specification.
The test measures the force required to break an ampoule under specified conditions. It does not independently establish transport durability, container integrity, or clinical usability.
Do not transfer fixture dimensions, loading speeds, or force limits from an unrelated method. These details must match the applicable standard and ampoule configuration.
For one-point-cut ampoules, check whether ISO 9187-2 also applies. The opening feature introduces orientation requirements that must be reflected in the test procedure.
A defensible compliance claim requires the specified method and acceptance rules. A machine displaying force in newtons does not, by itself, demonstrate conformity.
Which Samples Should You Test, and How Should You Prepare Them?
Start with a documented sampling plan that identifies the lot, sample quantity, selection method, and acceptance rules. Avoid selecting only visibly uniform or convenient specimens.
Identify nominal capacity, ampoule form, glass specification, and opening system. Different ampoule configurations may require different fixture settings and must remain separately traceable.
Define whether testing concerns supplied empty ampoules or finished, processed units. Filling, sealing, and subsequent processing can affect the interpretation and comparability of results.
Inspect specimens before testing and record visible cracks, chips, or damaged opening features. Handle these findings according to predefined rules rather than silently replacing specimens.
Apply the conditioning requirements specified by the applicable method or approved procedure. Record relevant environmental conditions, especially when comparing results across sites or suppliers.
Do not add scoring, scratch the neck, or otherwise modify the opening feature unless explicitly required. Such changes alter the property being evaluated.
What Equipment Is Needed for a Repeatable Ampoule Break Force Test?
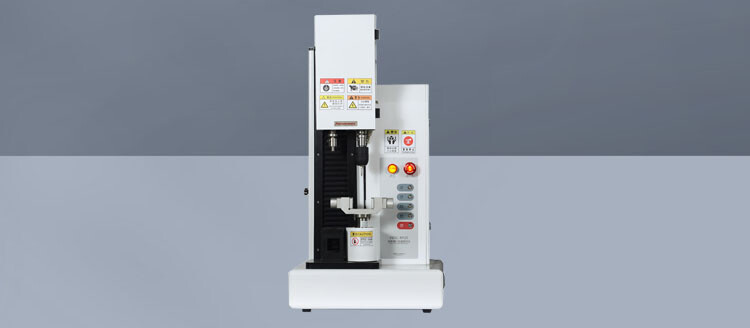
Use a force-testing instrument with a suitable load cell, controlled motion, and an ampoule fixture that reproduces the geometry required by the applicable method.
Select the load-cell range around the expected breaking forces. An unnecessarily large capacity can compromise useful resolution and make small differences harder to interpret.
Check documented measurement accuracy across the working range. Display resolution alone does not establish that the instrument measures force accurately at your actual test levels.
The acquisition system must capture the brief fracture event reliably. Confirm that its sampling and peak-detection functions can resolve the event without misleading artifacts.
Verify calibration status, fixture condition, alignment, and motion control before use. Where required, perform documented intermediate checks using an appropriate verification device or reference.
Provide a transparent protective enclosure or equivalent guarding suitable for glass fracture. The operator should be able to position specimens without entering an exposed hazard.
How Should You Position the Ampoule and Its Opening Point?
Positioning is often the largest preventable source of variation. A small change in support location or loading contact can change the measured breaking force.
Set the supports and loading component to the dimensions shown in the applicable standard. Use the correct settings for the ampoule size being tested.
Confirm that the intended fracture region occupies the specified position relative to the supports and loading contact. Do not estimate alignment solely by eye.
For ampoules with a directional opening feature, orient the mark and weakened region as required. An incorrect orientation can produce misleadingly high or inconsistent results.
Keep unintended contact away from the neck and body. Fixture edges, clamps, or accumulated glass fragments can create additional stresses outside the intended loading arrangement.
Use a setup photograph or approved fixture diagram in the operating procedure. This helps operators reproduce orientation and contact locations across shifts and laboratories.
How Do You Apply Force and Capture the Breaking Event?
Begin by confirming specimen identity, method settings, fixture position, and protective guarding. Record the sample identifier before loading so broken specimens remain traceable afterward.
Zero the force system according to the instrument procedure. Ensure that zeroing does not conceal unintended specimen loading or an incorrectly seated fixture component.
Bring the loading component into the specified starting position without impact. Any contact force or preload must follow the approved method rather than operator preference.
Apply load at the rate prescribed by the applicable standard. Avoid manual impacts, uncontrolled acceleration, or changing the programmed rate between specimens during a series.
Capture the force at fracture using the method’s defined result. Check the force trace where available to distinguish actual breakage from contact spikes or vibration.
Observe where the ampoule breaks and whether it slips during loading. A numerical peak alone may hide an invalid setup or an abnormal failure location.
After the motion stops, remove fragments safely and inspect the fixture. Clear debris before the next specimen, then repeat using the same documented settings.
How Do You Decide Whether the Results Are Acceptable?
Compare results with the breaking-force requirements applicable to the ampoule designation and opening system. Confirm the correct limits directly from your controlled reference documents.
Avoid applying one universal force range to every ampoule. Capacity, design, and the specified opening system can affect which requirements govern the acceptance decision.
Evaluate both excessively high and excessively low forces where the specification defines them. Each can indicate a different concern about intended opening performance.
High force may make opening difficult, while low force may indicate insufficient resistance under the specified test. Neither result alone predicts every real-world handling outcome.
Retain individual measurements alongside the mean, standard deviation, and range where useful. An acceptable average can conceal individual failures or a broad, unstable distribution.
Apply the approved lot acceptance rule exactly. Do not replace individual limits with an average-based decision or invent retesting allowances after seeing unfavorable results.
What Should You Investigate When Results Vary or Fail?
First separate possible measurement problems from product variation. Check fixture settings, opening-point orientation, loading rate, calibration status, and specimen seating before drawing manufacturing conclusions.
Review the force traces and fracture observations together. Unexpected preliminary peaks, slipping, or breakage away from the intended region may indicate a setup problem.
If the measurement system is sound, investigate relevant production factors. These may include neck geometry, wall-thickness variation, opening-feature consistency, and glass stress or damage.
Stratify results by supplier lot, production line, tooling position, or processing stage when those identifiers exist. Grouped data can reveal patterns hidden within pooled averages.
Define invalid-test criteria in advance and document every exclusion. An unfavorable result is not invalid merely because it differs from the rest of the batch.
Use your deviation or out-of-specification procedure for failures. Preserve original data, investigate assignable causes, and authorize any repeat testing through the established quality process.
How Should Safety Teams Use the Findings?
Breaking force is one part of opening safety. Evaluate it alongside fracture appearance, sharp edges, fragment generation, and the intended user’s actual opening procedure.
A result within the specified force limits does not guarantee fragment-free opening. Additional assessments may be needed to address the risks identified for your product.
During laboratory testing, use suitable eye protection, guarding, and glass-handling controls. Establish a safe collection route for broken ampoules and contaminated fragments where relevant.
For filled products, assess the contents before testing. Follow applicable containment and disposal procedures when breakage could release hazardous, potent, biological, or otherwise controlled material.
Use recurring breakage patterns to guide supplier discussions and process improvements. Keep standardized force measurements distinct from observations collected during simulated or actual user opening.
How Do You Select a Tester for Routine Quality Control?
Start with your ampoule range and required method, then assess the instrument. Request evidence that its fixture accommodates each relevant size and opening configuration.
Ask the supplier to demonstrate support adjustment, orientation control, loading-rate settings, and fracture capture. A demonstration using your specimens is particularly useful before purchase.
Evaluate routine operation as well as measurement capability. Fixture access, fragment removal, setup repeatability, and clear method selection affect consistency during daily quality control work.
Where electronic records support regulated decisions, assess access controls, audit trails, data retention, and export functions against your organization’s applicable requirements and validation approach.
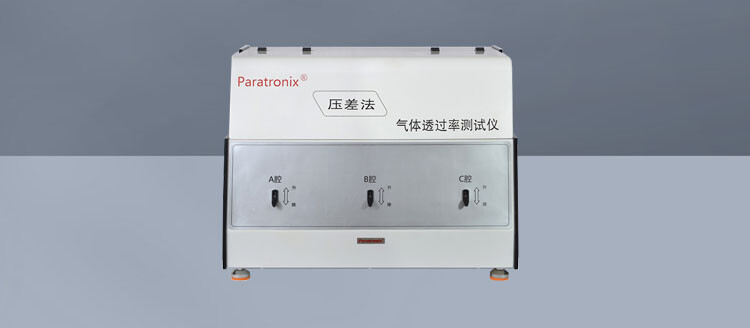
Paratronix Instruments Co., Ltd. manufactures packaging testing instruments and provides testing solutions. Discuss your ampoule specifications, applicable standard edition, and documentation needs when evaluating suitability.
What Should the Test Report Include?
Record the standard and edition, approved procedure, ampoule designation, lot identity, sample quantity, and specimen condition. Include conditioning details and any relevant processing history.
Identify the tester, load cell, fixture, calibration status, loading rate, and fixture settings. Record opening-point orientation whenever it affects how the test is performed.
Report individual breaking forces in newtons, relevant summary statistics, fracture observations, and any invalid tests. Link retained force traces to their corresponding specimen identifiers.
State the acceptance criteria and their source, followed by the decision under the approved sampling plan. Document deviations and investigations that affect interpretation or release.
A complete report should allow another qualified person to understand what was tested, reproduce the setup, and assess whether the conclusion follows from the evidence.
Making Ampoule Break Force Results Useful for Quality Decisions
A reliable ampoule break force test combines a correctly configured fixture, controlled loading, traceable specimens, and acceptance criteria taken from the applicable requirements.
For quality control teams, the priority is reproducibility and defensible disposition. For safety teams, force results should inform a broader assessment of opening behavior.
Before routine testing, confirm the standard edition, demonstrate the setup with representative ampoules, and approve the reporting rules. These steps make subsequent results meaningfully comparable.