




Recent Posts
 Where should wall thickness be measured on a medicine bottle?Nov 06, 2026
 Can a wall thickness tester measure the base of a medicine bottle?Nov 06, 2026
 How does a medicinal bottle wall thickness tester work?Nov 06, 2026
 Can an oxygen permeability tester measure finished packages?Nov 05, 2026
 What ASTM D3985 requires from an oxygen permeability testerNov 05, 2026
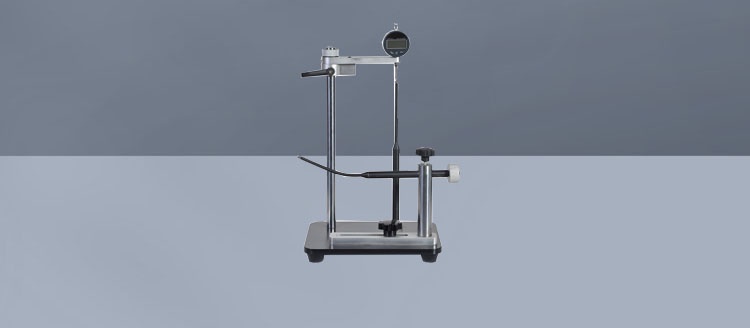
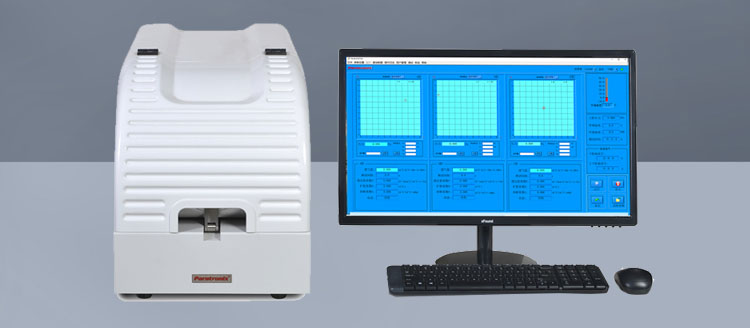
Consistent wall thickness helps medicinal bottles protect their contents and withstand handling throughout production and distribution. But how can manufacturers check thickness without cutting open every container?
A Wall Thickness Tester For Medicinal Bottles measures the distance between the inner and outer walls at selected points, helping identify thin spots and variations.
This article explains the measurement principles behind these instruments, the typical testing process, and how the results support pharmaceutical packaging quality control.
How Does a Medicinal Bottle Wall Thickness Tester Measure the Wall?
A non-destructive wall thickness tester measures a bottle wall from one accessible side by using a physical property that changes with wall thickness.
For many plastic and non-magnetic glass bottles, a common approach is magnetic measurement: a probe outside the bottle detects a small target placed inside.
The instrument interprets the relationship between the probe and target as a distance, then displays the measured thickness. The bottle wall separates the two components.
As the operator moves the probe and target across the container, the reading changes with the local wall thickness. Some instruments record the minimum value.
Other testers use ultrasonic pulses instead. These estimate thickness from the time sound takes to travel through the wall and return to the probe.
Neither method measures the whole bottle automatically in every configuration. The result depends on which areas are reached, how the instrument is calibrated, and the bottle material.
How Does Magnetic Wall Thickness Testing Work?
A magnetic tester typically uses a probe containing a magnetic field sensor and a small steel target, often a ball, placed inside the bottle.
Magnetic attraction holds the target against the inner surface near the probe. The field detected by the sensor changes as the distance between them changes.
The instrument uses a calibration relationship to convert that sensor response into a thickness reading. The displayed value represents the local wall between probe and target.
To scan a bottle, the operator moves the probe over the outside while the target follows inside. The process can reveal changes across the scanned path.
For example, a reading may decrease as the probe approaches a stretched shoulder, indicating a thinner area. A minimum-capture function can retain the lowest observed reading.
Magnetic testing is useful when only the exterior is accessible to the probe and a target can be inserted. It does not require cutting the bottle.
However, the target must remain correctly coupled to the probe and be able to reach the intended location. Tight necks, sharp transitions, and recessed bases can complicate access.
Target size matters too. A smaller target may reach tighter features, while a larger one may suit other thickness ranges; compatibility depends on the instrument and application.
Ferromagnetic components, nearby metal, coatings, and unusual container constructions can affect suitability or readings. Test representative samples and follow the instrument manufacturer’s guidance.
How Is Ultrasonic Testing Different?
An ultrasonic tester sends a high-frequency sound pulse into the bottle wall. Reflections from material boundaries return to the probe and are converted into a thickness reading.
The calculation depends on the sound velocity configured for the material. Incorrect velocity settings can produce systematic errors even when the instrument operates consistently.
Ultrasonic probes generally need suitable contact with the surface and a coupling medium or another approved coupling arrangement to transmit sound effectively into the wall.
This approach can avoid placing a target inside the bottle, but thin walls, curved surfaces, complex layers, and material properties may make reliable echoes difficult to obtain.
Multilayer containers require particular care: depending on the instrument and construction, an echo may represent an interface between layers rather than the complete wall thickness.
Magnetic and ultrasonic methods are therefore not interchangeable by default. Confirm the intended measurement, material compatibility, access, and achievable accuracy using actual bottles.
What Happens During a Typical Bottle Test?
The exact procedure varies by instrument, but a magnetic inspection usually follows a sequence designed to make measurements repeatable and results traceable.
- Select a probe and target compatible with the bottle geometry and expected thickness range. Check that the target can pass through the opening and reach critical areas.
- Inspect the probe, target, and bottle for damage or contamination. Clean them as required by the equipment instructions and the facility’s handling procedures.
- Calibrate or verify the instrument using the specified reference standards and configuration. Confirm performance across a range relevant to the expected bottle thickness.
- Place the target inside the bottle and position the external probe so the target is held against the inner wall at the measurement point.
- Measure defined locations or scan specified paths, maintaining the contact and probe orientation required by the method. Record individual readings and any relevant minimum value.
- Compare results with the approved specification, document the sample and instrument details, and handle any out-of-specification result according to the quality procedure.
For ultrasonic testing, preparation includes setting or verifying the material velocity and establishing an appropriate coupling method. Reference pieces should represent the material and geometry where practicable.
Non-destructive measurement does not automatically make a bottle suitable for product use. A target or coupling medium may introduce contamination, so follow site procedures for sample disposition.
Where Should You Measure a Medicinal Bottle?
A single reading cannot establish thickness uniformity. The measurement plan should cover locations where the manufacturing process or bottle shape could create meaningful variation.
- Sidewall: Measure at several heights and around the circumference to assess distribution across the main body.
- Shoulder: Check transitions between the neck and body, where forming and stretching may produce localized thin areas.
- Base and heel: Assess accessible regions around the bottom and lower sidewall, including transitions that may affect stability or strength.
- Neck and finish: Measure relevant accessible areas when specified, while accounting for threads, curvature, and probe or target limitations.
The best locations depend on the container design and its manufacturing history. Use development data, known defects, and process knowledge to refine the inspection plan.
Scanning can help locate unexpected thin spots between fixed points, but coverage still depends on the path followed. Document both scan routes and inaccessible regions.
For routine comparison, use the same locations and technique across samples. A repeatable map makes it easier to distinguish genuine process changes from sampling differences.
What Do the Results Tell You About Bottle Quality?
Wall thickness results describe local material distribution. A low value may indicate an area requiring investigation, particularly when it falls below an established acceptance limit.
Variation across a bottle or between samples can also reveal changes in forming conditions. Trends may help teams investigate material distribution before a problem becomes widespread.
For example, a shift toward thinner shoulders across successive samples may justify checking process settings. The reading alone does not identify the cause of that shift.
Thickness is not a complete measure of package performance. Material properties, bottle geometry, defects, closure design, and processing conditions also affect strength and protection.
Likewise, a wall thickness result alone cannot establish barrier performance, sterility, or container closure integrity. Use the relevant performance tests alongside dimensional inspection.
Acceptance limits should come from the approved bottle specification and a documented assessment of the application. There is no universal thickness value suitable for every medicinal bottle.
What Affects Measurement Accuracy and Repeatability?
Reliable readings require more than a display with fine resolution. Consider the instrument’s stated accuracy, calibration conditions, measurement range, and performance on the actual container.
Reference standards: Use standards specified for the device and verify readings near the thicknesses of interest. A single check point may not reveal errors elsewhere.
Probe contact and alignment: Curvature, seams, embossing, and abrupt transitions can prevent consistent positioning. Follow the prescribed technique and identify areas that cannot be measured reliably.
Target control: In magnetic testing, confirm that the target follows the probe and remains seated correctly. A displaced or incorrectly sized target can distort results.
Material and construction: For ultrasonic testing, sound velocity and internal interfaces matter. For magnetic testing, metal and other application-specific influences may require additional evaluation.
Operator technique: Scan speed, pressure, and measurement location can affect repeatability. Train operators and check whether different people obtain comparable results on representative samples.
Instrument verification: Check performance at intervals defined by the quality system, including after events that may affect the probe or calibration. Investigate failed checks before accepting results.
A measurement system study using representative bottles can help quantify variation from the instrument, operators, and positioning. Its findings should inform tolerances and inspection decisions.
How Do You Choose a Tester for Your Bottles?
Start with the bottle rather than the instrument specification sheet. Collect samples covering the materials, shapes, wall thicknesses, and features you expect to inspect.
Ask whether the probe and target can reach the shoulder, heel, and other critical areas. If using ultrasound, assess contact, coupling, and echo quality at those locations.
Compare the expected thickness range with the instrument’s measurement range and stated accuracy. Consider whether the uncertainty is small enough for decisions near specification limits.
Also evaluate minimum capture, data storage, calibration support, and connectivity against the inspection workflow. These features are useful only when they support a defined measurement procedure.
Request a demonstration or sample evaluation that includes difficult geometries and repeat measurements. Agree on what will be measured and how results will be judged beforehand.
Paratronix Instruments Co., Ltd. provides packaging testing instruments and solutions for pharmaceutical and other packaging applications. Discuss bottle samples and testing requirements when assessing a suitable configuration.
Conclusion
A medicinal bottle wall thickness tester measures local wall thickness non-destructively using a method such as magnetic sensing or ultrasound. Each method has distinct access and material requirements.
The most useful results come from a suitable instrument, verified calibration, representative measurement locations, and clear acceptance criteria. Thickness data supports quality decisions alongside other package performance tests.
Leave A Reply
Search by Keywords