




Recent Posts
 How does a laboratory bottle wall thickness tester work?Nov 16, 2026
 What Does a Beverage Bottle Wall Thickness Tester Measure?Nov 16, 2026
 What Does a Wall Thickness Tester Check in Cosmetic Bottles?Nov 16, 2026
 Can an ASTM E96 WVTR tester measure coated paper?Nov 14, 2026
 How does an ASTM E96 water vapor transmission rate tester work?Nov 14, 2026
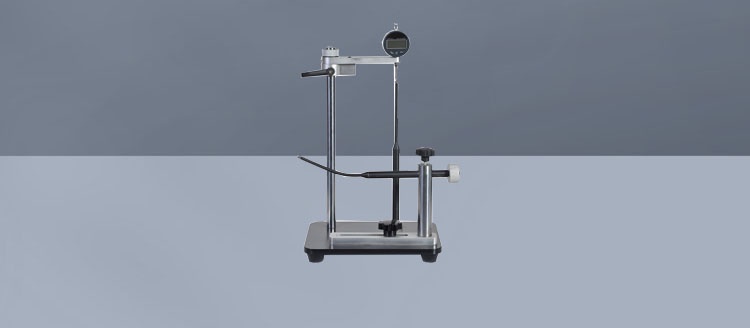
A laboratory bottle wall thickness tester measures the distance between the inner and outer surfaces at a selected point on a bottle. Depending on the instrument, it may infer that distance from the magnetic attraction between a probe and a target inside the bottle, or calculate it from the travel time of an ultrasonic pulse through the wall. A displayed reading is therefore the result of a measurement principle, a calibration, and the way the bottle is positioned—not simply a direct view of the material.
These measurements help a laboratory see how material is distributed around a bottle and identify areas that may be thinner or less consistent than intended. The method must suit the bottle’s material and shape: a technique that works well on a straight plastic sidewall may be difficult to use near a narrow neck, a sharp corner, or a multilayer structure.
What happens during a measurement?
Most bottle wall thickness tests follow the same sequence, even though the instruments use different physical principles. The operator checks the instrument against suitable reference pieces, positions the bottle at a chosen location, takes a reading, and repeats the measurement at other points. The readings can then be compared with a drawing, an internal specification, or results from other samples.
A single reading describes the wall at the measurement location and over the area sensed by the probe. It does not establish the thickness of the entire bottle. To assess distribution, the operator needs a repeatable plan for measuring the shoulder, body, base, or other relevant regions. Thin areas can occur between the selected points, so the spacing and number of measurements affect how much confidence the results support.
Two common approaches are magnetic target measurement and ultrasonic measurement. Both can be used without cutting the bottle, but they interact with the sample in different ways.
How magnetic target measurement works
A magnetic target system uses a probe on the outside of the bottle and a small magnetic target, often a steel ball, on the inside. The target is drawn toward the probe, with the bottle wall separating the two. As the wall becomes thicker, the separation changes the magnetic interaction detected by the instrument. The instrument converts that response into a thickness reading using its calibration.
To measure another point, the operator moves the probe across the outside surface while the target follows on the inside. This makes the method useful for examining variations around a container without cutting it open. Some instruments can also retain minimum readings during a scan, which can help an operator investigate a suspected thin area. The behavior and scan functions depend on the instrument.
The target has to be placed inside the container and must be able to reach the region being measured. A narrow opening, internal feature, or complex base can make positioning difficult. The target also needs to sit against the inner surface opposite the probe; if its position is unstable, the reading may be affected. Probe contact, surface curvature, and target size can also influence results, so reference checks and operating technique should match the intended measurement as closely as practical.
Magnetic target measurement generally provides the total separation between the probe and target at the measured point. For a multilayer bottle, that is a reading of the combined wall rather than a separate measurement of each layer.
How ultrasonic measurement works
An ultrasonic thickness tester sends a short sound pulse from a probe into the bottle wall. The pulse travels through the material and is reflected at a boundary. The instrument uses the time associated with the returning signal, together with an assumed or calibrated sound velocity in the material, to calculate thickness. In a simple pulse-echo measurement, the relevant travel distance is through the wall and back.
The instrument needs a usable acoustic connection between the probe and the bottle surface. A coupling medium may be applied to help transmit sound across the contact area. Good contact matters on curved bottles: if the probe sits unevenly or moves during measurement, the returning signal may be weak or inconsistent.
The sound velocity used in the calculation is equally important. Different materials transmit sound at different speeds, and a setting suited to one material may give misleading results on another. A reference sample of known thickness and representative material can help establish the appropriate setting. The user should also follow the instrument’s procedure for checking measurement performance over the intended thickness range.
Ultrasonic testing can be convenient when the inner surface is inaccessible, because the probe is applied from the outside. Its suitability still depends on whether the instrument can resolve a reliable signal from the wall. Very thin walls, complex shapes, strong curvature, and material structure can make signal interpretation more difficult. In multilayer packaging, interfaces may produce additional reflections; whether individual layers or only an overall thickness can be measured depends on the materials, layer thicknesses, and instrument capabilities.
Where should a bottle be measured?
The measurement plan should reflect how the bottle is formed and used. The body is an obvious starting point, but the shoulder, transition into the base, and other changes in geometry may also matter. These areas can behave differently during forming and can be harder to measure consistently.
For a basic distribution check, a laboratory might define several heights and take readings around the circumference at each height. Additional points can be selected near transitions or other areas identified as important for the bottle design. The exact locations should be recorded so that later samples are measured in the same way. If the goal is to locate a minimum, a scan or a denser set of readings may be more informative than a few widely spaced points, provided the instrument and geometry allow it.
Access sets practical limits. A probe may be too large to sit properly on a tight radius, or an internal target may not settle at the intended point. A result taken nearby can still be useful, but it should be recorded as a reading from that location. It should not be treated as proof of the thickness at an inaccessible corner.
How to interpret the results
Consider both the individual readings and their spread. A bottle can have an acceptable average wall thickness while one area is considerably thinner than the rest. Conversely, a difference between two readings is not automatically a defect: the bottle design may intentionally place different amounts of material in different regions.
The useful comparison is with a requirement appropriate to the location and application. A minimum thickness requirement, for example, addresses a different question from a target average or a limit on variation. If a drawing or internal specification defines measurement locations, the test plan should follow those locations so that the result and the requirement describe the same feature.
Wall thickness also does not independently prove that a bottle will perform as intended. Resistance to handling, stacking, impact, or internal pressure can depend on material properties, geometry, processing, and other design features. Thickness readings are valuable evidence about material distribution; performance questions may require additional tests suited to the intended use.
Why readings can differ
When two measurements disagree, start by checking whether they describe the same point on the same surface. A small change in position near a transition can produce a meaningful difference. Probe angle, contact, target alignment, coupling, instrument settings, and the condition of the reference pieces can also affect the result.
Method matters when comparing instruments. A magnetic system and an ultrasonic system use different measurement principles and may respond differently to curvature, surface condition, and material structure. Their results should not be assumed interchangeable simply because both displays show a thickness. If a laboratory needs to compare methods, it can measure representative bottles at defined locations, repeat the readings, and investigate consistent differences before using the results for the same acceptance decision.
A practical check is to repeat measurements at marked points, including a difficult area as well as an accessible sidewall. If repeated readings vary substantially, the operator can examine positioning and instrument setup before deciding whether the variation belongs to the bottle. Keeping the measurement method, settings, locations, and reference checks with the results makes later comparisons easier to interpret.
For an initial assessment of a testing method, use bottles that represent the intended materials and geometry, including the smallest opening and most difficult measurement region. A stable reading on a flat reference piece demonstrates only part of the task; the method also needs to produce repeatable, interpretable measurements on the bottle itself.
Leave A Reply
Search by Keywords