




Recent Posts
 Can an ISO 15105-2 oxygen tester measure high-barrier films?Nov 06, 2026
 How to check an oxygen tester against ISO 15105-2 requirementsNov 06, 2026
 How to prepare film samples for ISO 15105-2 oxygen testingNov 06, 2026
 Choosing an ISO 15105-2 oxygen tester by measurement rangeNov 06, 2026
 How does an ISO 15105-2 oxygen permeability tester work?Nov 06, 2026
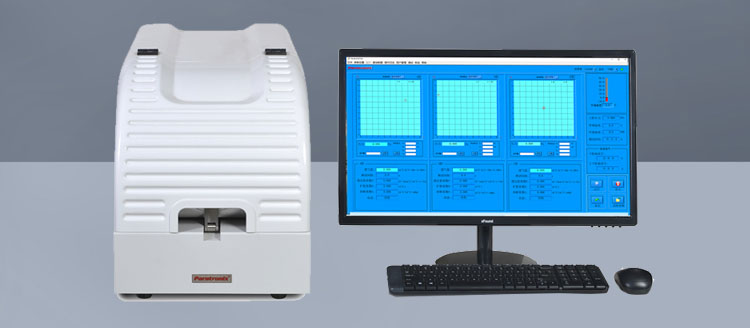
Accurate oxygen transmission results depend on more than the condition of the analyzer. A specimen that is creased, contaminated, improperly conditioned, or poorly sealed in the test cell can produce a result that does not represent the film. Before starting an ISO 15105-2 oxygen permeability tester, confirm that the material, specimen dimensions, conditioning, and mounting arrangement are suitable for the intended test.
ISO 15105-2 describes an equal-pressure method for determining the oxygen gas transmission rate of plastics film and sheeting using a coulometric sensor. Preparation details must be checked against the applicable edition of the standard, the instrument instructions, and the agreed test specification. A procedure that produces a readable result is not necessarily sufficient to support a claim of conformity to the standard.
Define what the specimen must represent
Before cutting, identify the material and the purpose of the measurement. A flat sample taken from a roll can characterize the film at the selected locations, but it does not automatically represent the barrier performance of a finished pouch, tray, or other package. Seals, folds, forming stresses, and other features of a finished pack require separate consideration.
Record the film identification, lot or roll number, structure if known, and any relevant processing history. For multilayer materials, note which surface is intended to face the oxygen-rich side of the cell. Orientation is important for repeatability, particularly when coatings, printing, surface treatments, or moisture-sensitive layers are involved. Do not assume that the two faces are interchangeable merely because they look similar.
Select specimens according to the sampling plan for the material and the decision being made. For a roll, record the position from which each specimen was taken, including its approximate location across the web and along the roll where relevant. Samples cut from adjacent points may be useful for repeatability checks, but they provide limited information about variation across an entire roll or lot.
Use separate specimens for replicate measurements unless the test procedure explicitly permits reuse. Mounting can leave impressions, introduce contamination, or damage the film, so a previously tested piece should not automatically be treated as equivalent to an unused one.
Protect the film before cutting
Keep the material in clean protective packaging until preparation. Handle it by the edges with clean, dry hands or clean gloves that do not shed particles or leave residues. If gloves are used, change them when contaminated and avoid touching the central test area. Silicone, grease, adhesive residue, powder, and cleaning chemicals can alter the surface or interfere with the seal.
Place the film on a clean, smooth surface. A rough bench, contaminated cutting mat, or stack of hard-edged objects can scratch or puncture a specimen before the damage becomes obvious. Avoid folding the material to make it easier to handle: a permanent crease in the exposed area can create a local weakness and make the film difficult to seal flat.
Inspect the sample under suitable lighting. Look for scratches, holes, wrinkles, gels, delamination, coating defects, and visible contamination. The correct response depends on what the test is intended to measure. A specimen with accidental handling damage should be rejected; a manufacturing defect that is part of the material condition being investigated should be documented rather than silently removed from consideration.
Do not clean the film with a solvent simply because marks are visible. A solvent can extract additives, affect coatings, or leave a residue. If cleaning is necessary, use a documented method compatible with the material and the test specification, and record the treatment. When contamination cannot be removed without changing the specimen, prepare a fresh piece.
Cut for the test cell, not just for the exposed area
Use the instrument’s specimen template or the dimensions specified for the cell. The specimen must cover the complete opening and provide enough material for the sealing surface around it. A piece cut only to the size of the exposed opening cannot be reliably clamped; an excessively large piece may bunch up or interfere with the fixture.
Cut on a clean backing surface with a sharp, appropriate die, cutter, or scissors. Keep the cutting edge outside the area that will be exposed to the test gas. Frayed edges and small tears are particularly troublesome if they extend into the seal path. Replace a damaged specimen rather than attempting to patch it with tape.
Avoid stretching the film during cutting. Thin or soft films can distort when pulled against a template, changing local thickness or leaving the piece under tension when mounted. Support the film flat, apply only enough force to hold it in place, and mark orientation outside the exposed and sealing areas. Ink or labels placed in the test area can introduce an unintended layer or contamination.
For coated or laminated film, identify the faces before the piece becomes too small to distinguish. A simple diagram in the test record can be more reliable than a label such as “top,” which may lose its meaning once the specimen is removed from the roll.
Measure thickness without damaging the barrier
Thickness is important for identifying material variation and for any calculation that relates transmission to thickness. Measure it using an instrument and procedure appropriate to the film, with suitable contact pressure and resolution. A gauge that compresses a soft film, bridges an embossed surface, or contacts a particle can give a misleading reading.
Take readings at the locations required by the applicable method or laboratory procedure. Where practical, avoid making gauge impressions in the area that will be exposed in the cell. Record individual readings or the specified summary value and note unusual variation. Do not discard an inconsistent reading without checking whether it reflects measurement error or a genuine feature of the film.
Keep oxygen transmission rate and permeability distinct. The measured transmission rate is associated with the specimen under stated test conditions. A thickness-normalized value requires an appropriate calculation and assumptions about the material. For multilayer films, a single total thickness does not by itself describe the contribution of each layer, and a simple thickness normalization should not be treated as a complete description of the laminate.
Condition the specimen under the intended test conditions
Temperature and relative humidity can change the oxygen barrier of some films, especially structures containing moisture-sensitive layers. Conditioning is therefore part of specimen preparation, not an optional waiting period chosen for convenience. Use the conditions and duration required by the applicable standard edition or agreed specification, and record any deviation.
Keep specimens separated or otherwise arranged so the relevant surfaces can be exposed to the conditioning environment. A tightly stacked bundle may not equilibrate in the same way as individual sheets. Protect the material from dust while allowing the required exposure, and avoid placing it against a surface that could contaminate it or restrict access to one face.
Minimize the time and environmental change between conditioning and mounting. A specimen conditioned at one humidity and then left on an open bench may begin to change before the measurement starts. If the test cell provides controlled humidity, allow for the instrument’s specified equilibration procedure after mounting; conditioning outside the cell does not eliminate the need for the system to stabilize.
Record the actual conditioning conditions, start and end times, and any interruption. Do not substitute a convenient laboratory ambient condition for a specified condition without identifying the change. Results obtained at different temperatures or humidities should not be compared as though the environmental conditions were identical.
Mount the specimen without creating a leak path
Before loading, inspect the cell, gasket, and contact surfaces. Remove particles and remnants of previous specimens using the instrument manufacturer’s approved cleaning procedure. Check the gasket for cuts, permanent deformation, contamination, or incorrect seating. A clean film cannot compensate for a damaged seal.
Position the specimen flat over the opening with the selected face toward the designated gas side. The central test area should be free of folds, slack that could trap against the cell, and excessive tension. Align the film so the gasket contacts an uninterrupted surface around the full perimeter. Printing, heavy embossing, coating steps, or a wrinkle across the sealing zone can create a leakage path even when the exposed center looks sound.
Close the cell using the specified sequence and clamping force or settings. Uneven tightening can distort the gasket or film; overtightening can also damage thin material. If the instrument uses a sealing compound or other accessory, use it only as directed for that cell and specimen type. Keep it out of the exposed area and document its use. An improvised seal can contaminate the film or mask a mounting problem.
After closing the cell, check that no film has slipped out of position and that the clamp is fully seated. Follow the instrument’s prescribed leak-check and system verification procedures. A leak can allow oxygen to reach the sensor without passing through the intended film area, producing an apparent transmission rate that is too high. For high-barrier specimens, a small leak can be especially consequential relative to the oxygen passing through the material.
A stable reading alone does not prove that the seal is sound. If the instrument reports an unexpected result, inspect the mounting and repeat the relevant checks before attributing the value to the film. Use a new specimen if removal or remounting could have altered the original.
Resolve preparation problems before accepting a result
When replicate results disagree, compare the preparation records as well as the numerical values. Different roll positions, face orientation, thickness, conditioning history, or time spent outside the controlled environment can explain why apparently identical specimens behave differently. Check whether one specimen had a crease, an irregular sealing area, or visible residue after removal from the cell.
For an unexpectedly high result, consider both genuine film defects and bypass leakage. Inspect the gasket and sealing zone, verify the cell setup, and test a fresh specimen from a documented location. Repeatedly tightening the same mounted specimen is not a reliable substitute for finding the cause: it can change the seal or damage the film while leaving the source of the problem unresolved.
An unexpectedly low or slowly changing reading calls for a different review. Confirm that the correct test conditions and exposure time were used, that the system has reached the stability criteria specified by the method or instrument procedure, and that no protective liner or unintended additional layer remained on the specimen. Stopping before the measurement has stabilized can give a result that does not represent steady transmission under the stated conditions.
Retain enough information to reconstruct each preparation: specimen identity and sampling location, orientation, thickness measurements, conditioning conditions and duration, test-cell identification, mounting observations, and any deviations. Record rejected specimens and the reason for rejection when the sampling plan requires it. This makes it possible to distinguish a material difference from a preparation or sealing difference when results are reviewed later.
Leave A Reply
Search by Keywords