




Recent Posts
 How to choose an ASTM F1307 tester for low oxygen transmission ratesNov 07, 2026
 What does an ASTM F1307 oxygen permeability tester measure?Nov 07, 2026
 How does a bottle bottom thickness tester measure the base?Nov 07, 2026
 What Does a Bottle Wall Thickness Tester Measure in PET Packaging?Nov 07, 2026
 Can an ISO 15105-2 oxygen tester measure high-barrier films?Nov 06, 2026
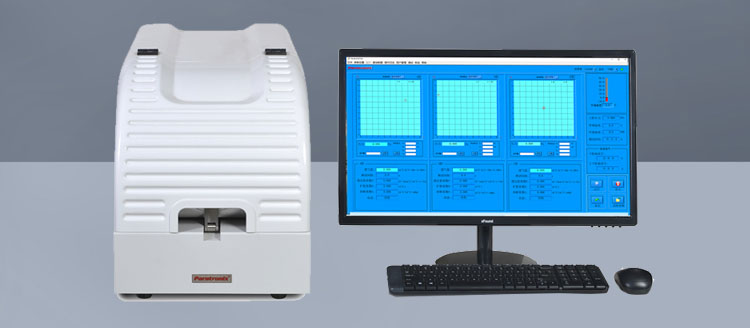
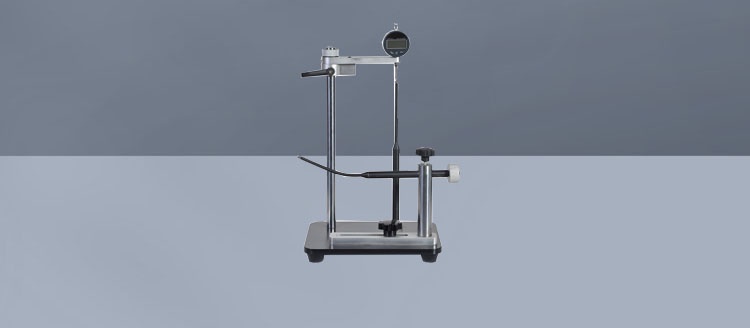
A Bottle Wall Thickness Tester measures the thickness of PET bottle walls at selected points, helping manufacturers assess how evenly material is distributed across a container. These measurements can reveal variations around critical areas such as the shoulder, body, and base, where uneven thickness may affect bottle performance or material use. Understanding what the tester measures—and how the results are interpreted—is an important first step in evaluating PET packaging quality and production consistency.
The distinction is that the instrument reports a local measurement, not the performance of the whole bottle. A single reading tells you how much material lies between the inner and outer surfaces at one location. A useful assessment comes from choosing representative locations, measuring them consistently, and relating the results to the container’s intended use.
What Is Actually Being Measured?
Wall thickness is the distance through the bottle material from its outside surface to its inside surface at a particular point. Results are commonly displayed in millimeters or another selected unit of length. In a PET container, this dimension changes from place to place because the material does not stretch uniformly during blow molding.
A thickness tester can show whether a measured point falls within a specified range. Depending on the instrument and measurement method, it may also help an operator locate a thin area, record a series of readings, or compare points around the bottle. The output might be a set of individual values, a minimum reading, or a summary calculated from selected measurements.
That summary needs context. The minimum of ten selected points is the lowest value among those ten points; it is not automatically the lowest thickness anywhere on the bottle. If the measurement plan misses a narrow thin spot, the report may look acceptable while the actual container contains a weaker region.
Why Thickness Changes Across a PET Bottle
PET bottles are commonly formed by heating a preform and stretching it inside a mold. The finished shape, preform geometry, temperature distribution, stretch behavior, and molding conditions all influence where material ends up. Changes in any of these factors can alter the thickness profile, even when the bottle’s external dimensions appear unchanged.
The shoulder is a transition between the neck and body, so its curved geometry deserves attention. On the body, a tester can reveal differences between heights or around the circumference. Near the base, measurements can be more challenging because the shape may include tight curves, feet, ribs, or a central gate area. The neck finish is generally a different geometry from the blown body, and whether it can be measured depends on the tester and the feature being inspected.
Not every difference is a defect. Bottle designers may intentionally place more material in some regions than in others. The question is whether the actual distribution is suitable for the design and sufficiently consistent for the application—not whether every point has the same thickness.
How Common Measurement Methods Differ
Several methods can be used to assess PET bottle wall thickness. They do not all measure in the same way, and they may not give directly comparable results without a defined procedure.
Magnetic or Hall-effect measurement
Many non-destructive bottle gauges use a probe on one side of the wall and a small magnetic target on the other. The instrument detects a change in magnetic field related to the distance between the probe and target, then converts that response into a thickness reading. This allows operators to check many areas without cutting the bottle, provided the target can reach the location and the surfaces can be positioned appropriately.
Probe alignment, curvature, target size, calibration, and access can affect the result. A target that bridges a tight curve or cannot settle against the inside surface may not represent the true local wall thickness. The geometry of the bottle therefore matters as much as the nominal measuring range.
Mechanical measurement of cut sections
A bottle can also be cut into sections and measured with a suitable micrometer or thickness gauge. This destructive approach makes both surfaces accessible and can be useful when investigating a specific region. However, cutting can deform a thin section or leave an uneven edge, and measuring force and contact geometry can influence the result. The procedure must specify where and how the section is taken.
Other techniques, including ultrasonic or optical methods, may be applicable depending on the equipment, material, and geometry. Their suitability should be confirmed for the actual bottle rather than assumed from a general description. When comparing instruments, ask whether the stated accuracy applies to the relevant thickness range, curvature, and operating conditions.
What a Thickness Profile Can—and Cannot—Tell You
A profile is more informative than an isolated measurement. Readings taken at the same heights around several bottles can reveal whether one side is consistently thinner, whether a particular region varies between samples, or whether the distribution has changed after a process adjustment. Those observations can help a production team decide where to investigate.
For example, if readings around the shoulder show a recurring thin region in the same position, the next step is not simply to declare the bottle defective. The team should verify the measurement, compare it with the agreed specification, and examine relevant forming conditions and tooling. A single reading cannot identify the cause of the variation.
Thickness also does not directly measure top-load strength, burst resistance, impact performance, leak integrity, or barrier properties. These characteristics depend on other factors, including bottle design, material properties, processing history, closure performance, and test conditions. A thin region may be relevant to performance, but the relationship has to be evaluated with appropriate functional tests.
Bottle weight is not a substitute either. Two bottles can have similar total weights while distributing PET differently. One may contain adequate material in a stressed area; the other may have more material elsewhere and less where it is needed. Weight checks and wall-thickness measurements answer different questions.
Building a Measurement Plan That Makes Results Useful
Before comparing readings, define the locations and sampling approach. A practical plan usually includes points on the shoulder, body, and accessible base regions, with additional attention to features associated with the bottle’s intended use. Marking the bottle or using a consistent orientation makes it easier to compare the same positions over time.
The number of bottles and points should match the decision being made. A quick production check may use a smaller, predetermined set of locations. A qualification study or investigation into inconsistent performance may require more bottles, more positions, and a sampling schedule that captures relevant production variation. The acceptance limits should come from the bottle specification and validation work, not from the gauge manufacturer’s display settings.
Record enough information to make the numbers interpretable later: bottle identification, measurement locations, instrument and target used, calibration status, operator or method, and any unusual sample condition. If the bottle is measured after a particular conditioning period or at a specified temperature, record that too. The relevant details depend on the method and the quality system.
It is also worth checking repeatability. Have the same point measured more than once using the defined method, and investigate large differences before treating them as bottle variation. A repeatability check is not a substitute for instrument calibration or a full measurement-system assessment, but it can expose practical problems such as unstable positioning or difficulty finding the same location.
Interpreting Readings Without Overlooking Measurement Error
Resolution, accuracy, and repeatability describe different things. Resolution is the smallest display increment; it does not prove that the reading is accurate to that increment. Accuracy concerns how closely a result agrees with a reference under stated conditions, while repeatability concerns variation when a measurement is repeated under consistent conditions.
A bottle with complex curves may be more difficult to measure reliably than a flat calibration reference. Operators should follow the instrument manufacturer’s calibration and verification instructions and use reference materials appropriate to the method. They should also confirm that the target and probe can contact the intended surfaces without rocking, bridging, or interference from nearby features.
Be cautious with results close to an acceptance limit. If normal measurement variation is meaningful relative to the available tolerance, a pass-or-fail decision may depend on how the point was found or measured. That situation calls for a review of the measurement method and decision rules, not simply more decimal places on the report.
Choosing an Approach for Your Bottle
Start with the container rather than the instrument. Identify the thinnest and thickest regions you expect to measure, the size of the opening, the tightest curves, and whether the bottle must remain intact. A gauge may have a suitable nominal range but still be awkward to use if its target cannot move into the shoulder or its probe cannot reach a base feature.
Then consider the required output. A laboratory investigating a localized failure may prioritize access and documented measurement conditions; a production team may need a repeatable sampling routine and straightforward data recording. If the bottle is multilayer or has a coating, confirm what the selected method measures and whether it can distinguish individual layers. A total wall reading should not be treated as a separate barrier-layer measurement unless the method has been shown to provide that information.
Paratronix Instruments develops and supplies packaging testing instruments for applications including plastic, pharmaceutical, and high-barrier packaging. When assessing a testing approach, sharing an actual bottle, the locations of interest, the expected thickness range, and the required reporting method can help determine whether a proposed solution is suitable. Any applicable test method, acceptance criterion, or regulatory requirement should be confirmed against the project documentation.
The most useful result is not simply the smallest number displayed by a tester. It is a traceable set of measurements taken at meaningful locations, interpreted alongside bottle specifications and performance tests. That is what turns a local wall-thickness reading into a practical view of PET material distribution.
Leave A Reply
Search by Keywords